Cinnamon graham crackers from Alice Medrich

I never really liked crunchy cookies, but I think I have now (finally) come around. While I still will always find a warm, chewy oatmeal cookie entirely irresistible, I am willing to make a place in (my) world for the crunchy variety too.

One of the most appealing aspects of these types of cookies is their ability to keep exceptionally well. I don’t like soft cookies after a few days . . . They have lost all their original glory. But these are just as crunchy and good.

Also, it would be irresponsible for me to omit that I have recently become the very proud owner of an amazing ice cream machine. And I’m now envisioning a honey ice cream or frozen yogurt with graham crackers sprinkled throughout.

image
Cute and totally munch-able cookie crackers!

There are endless options with these graham crackers. Snacks, pie crusts, dessert accompaniments and bites of satisfying crunchy sweetness. I heartily endorse these little crackers!

And now, let’s get mixing and baking and eating!

Ingredients:

1 3/4 cups (225 grams) graham flour
1/2 cup plus 1 tablespoon (55 grams) oat flour (I made my own by blitzing in my Vitamix grains container)
1/4 cup (50 grams) sugar, plus 3 to 4 teaspoons for sprinkling
1/2 teaspoon salt
1/2 teaspoon baking powder
1/4 teaspoon baking soda
6 tablespoons (85 grams) cold unsalted butter, cut into 1/2-inch cubes
3 tablespoons (65 grams) honey
3 tablespoons milk
1/2 teaspoon pure vanilla extract

Optional: 1 teaspoon cinnamon in the cookie and an addition teaspoon for topping.

Note: I halved the recipe with no issues.

In a food processor fitted with the steel blade, combine the graham and oat flours, ¼ cup sugar, 1 teaspoon cinnamon, salt, baking powder, and baking soda. Pulse to mix thoroughly. Sprinkle the butter cubes over the flour mixture. Pulse until the mixture resembles cornmeal. In a small cup, stir the milk, honey, and vanilla together until the honey is dissolved.

Drizzle the honey mixture into the bowl. Process just until the mixture gathers into a single mass. Divide the dough in half and shape each piece into a 6 or 7-inch flat square patty. Wrap and refrigerate it until they are very firm but supple enough to roll out, 20-30 minutes. Or keep them refrigerated up to two days; let soften slightly at room temperature before rolling.

Position racks in the upper and lower thirds of the oven. Preheat the oven to 350 degrees. Roll one patty between the sheets of parchment paper until it is 1/8 inch thick (about 8 by 12 inches) and as even as possible from the center to the edges. (Try to avoid a thick center with thinner edges). Flip the paper and dough over once or twice to check for deep wrinkles; if necessary, peel the parchment and smooth it over the dough before continuing. Peel the top sheet of parchment off. Prick the dough all over with a fork. Sprinkle the dough evenly with 1 to 2 teaspoons of sugar and cinnamon. Repeat with the second patty. Slide one sheet of dough, with the bottom layer of parchment, onto each cookie sheet.

With a sharp knife, even up the edges of the dough and score it into squares, diamonds, or rectangles. Alternatively, pre-cut your dough using a nice pastry cutting roller that has a nice zig-zag design.

Bake for 20 to 25 minutes until the grahams are golden brown with deep brown edges. Rotate the pans from upper to lower and front to back a little over halfway through the baking time to ensure even baking. Set the pans on racks to cool. Break the grahams along the score lines. Cool the grahams completely before storing. Grahams keep in and airtight container for at least 3 weeks. Troubleshooting: Grahams crisp up after they are completely cool unless they are under baked. If your grahams are not thoroughly crunchy when cool (especially any in the center that might be a little thicker), return them (on a parchment lined baking sheet) to a preheated 325-degree oven for about 15 minutes. Let cool and check for crunch.

image.jpeg
A sizable half-batch!


Cinnamon graham crackers from Alice Medrich

Update: Baking Josey Baker Bread at Home

Not too long ago I posted about the class I took at the Mill with Josey Baker. That was actually just two weeks ago today. I’m not exaggerating when I say that it was a transformative class. The two-hour class, along with a careful reading of Josey’s book has taken my bread to a new level, or universe rather.

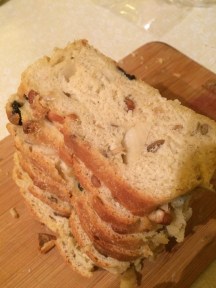
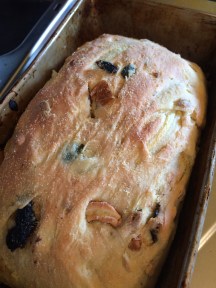
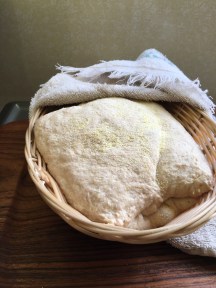
I first baked a loaf of bread in late 2015, and I was pleased that it actually rose a bit. The crust however, was rather non-existent, and the center dense and only ok (which isn’t high praise considering that all warm bread reaches at least that level)!

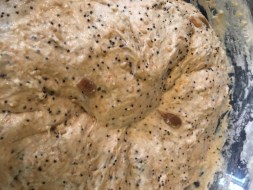
As is clear from the photos above, I was making bread before the class. It was starchy and had that yeasty taste. I was just so tickled that this time I hadn’t killed my yeast off.

But now, I’m really baking. Truly. The class taught me what “feels” right when adding water and flour and the right way to handle the dough.

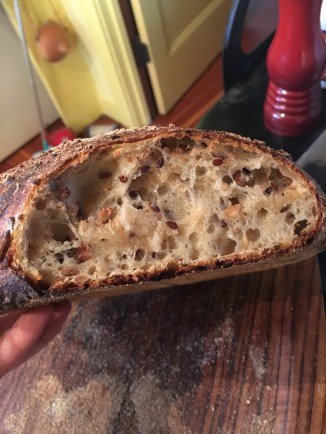
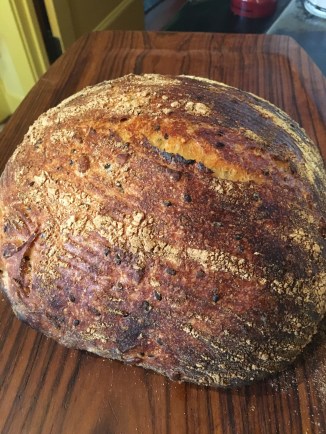
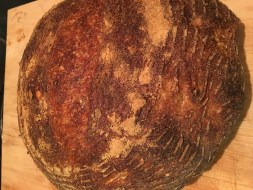
Today I made the (totally epic) seed feast bread from Josey Baker–but I added sesame seeds in lieu of pumpkin seeds, in addition to the flax seeds and sunflower seeds (as called for in the original recipe). I loved the flavor and crunch the seeds added, and how the bread is very versatile: fantastic with some triple cream Brie and pate slathered on, or a swipe of butter and almond butter.

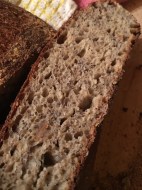
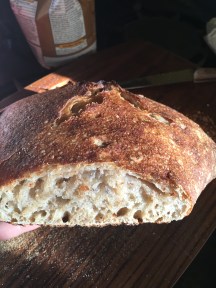
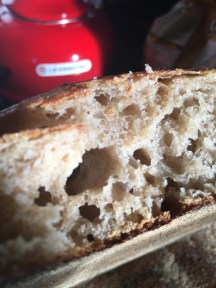
Last week, I experimented with adding  sesame seeds and poppy seeds. I think this combination of ingredients made the bread turn out with smaller holes and a bit denser, but still very tasty. See the photos below.


And my first loaf was just a country hearth loaf and was really great, without any extras.


I am so pleased with the bread I’ve baked so far from Josey’s book. It’s very readable, easy to follow, and not tailored to only  bread-aficionados. A must-read and must-eat. I will say, however, if you aren’t a natural at this whole baking with yeast deal, Josey’s class can bring out your best.

Update: Baking Josey Baker Bread at Home

Sun-dried tomato and wine braised chicken

On a busy weekend evening, I’m always so reluctant to make chicken. While economically and generally inoffensive, it needs some care to do really well. It’s hard to entirely ruin, but it’s not as easy to perfect as it might seem.

Last fall, I had some unpleasant run-ins with chicken. And it always involved the grill. I’m not good at focusing on one item at a time, so while I went out to the yard to grill chicken thighs, I wouldn’t tend to them and I’d return inside to steam a vegetable or prepare a salad dressing.  On more than one occasion (yes, embarrassing and idiotic, I know), I would return to find my chicken thighs as little balls of fire, and totally blackened, which was only revealed after I put out the fire on the poor chicken legs. This usually involved me wildly waving the chicken in the air, thigh by thigh to “wave” out the fierce fire.

If that’s not enough, most times the chicken was still raw inside. Instead of trying the chicken in the oven or cooking more of my signature “chicken en fuego,” I opted to switch to steak and pork recipes entirely.

However, I recently went over to close family friends’ house, and they made the most delicious chicken. It was simple, tasty, and I didn’t smell a hint of smoke or see a flame anywhere!

What was so fantastic was the gravy that was created as the chicken baked without any extra work. It was fragrant, rich and worthy of ladeling it over your chicken, polenta, salad, or whatever else you may find on your plate.

image.jpeg

This is definitely an easy, crowd-pleasing option. It’s done in a flash, making it great for a weeknight dinner or a Sunday night roast. Here’s to a bit more chicken in 2016.


Ingredients

3 chicken thighs, skin-on and bone-in
3-4 cloves of garlic, peeled and halved
1/2 yellow onion, roughly chopped
1/3-1/2 cup julienned sun-dried tomatoes
1/4 cup gourmet olives (I used a mix of black and green)
2 tablespoons sun-dried tomatoes
1 slice of smoked bacon
Lots of fresh tarragon, rosemary and thyme
2 tablespoons tomato paste
1-2 cups red wine (I used Yellow Tail Shiraz-Cabernet mix)
Garnish: grated Piave cheese; toasted pine nuts; herb pesto;

First, in a heavy cast iron pan big enough for all the chicken, cook the bacon until some fat has coated the pan, then add the chicken skin-side down. Add the chopped yellow onion. Let the chicken brown and then flip to brown other side. Add the garlic, sun-dried tomatoes, tomato paste, olives, herbs and stir. One everything is beginning to look browned or caramelized, add enough wine to have it come at least 1/4 inch up the chicken thighs. Transfer to oven and cook at 375 degrees for 25-30 minutes. Continue to baste the chicken during cooking once or twice. If the sauce thickens too quickly, then add a bit meow wine.

image.jpeg

Sun-dried tomato and wine braised chicken

Ovenly’s Heavenly Honey Blondies

The first time I heard about the Brooklyn-based bakery, Ovenly, was in one of Tasting Table’s daily emails they send out with recipes and food-related news. A prune, lemon and poppy seed coffee cake was featured. I wrinkled my nose in confusion and decided that my next coffee cake would have neither prunes, lemon nor poppy seeds. I found a recipe for an apple coffee cake mimicking the delicious one at the Elmwood Cafe in Berkeley and the thought of poppy seeds and prunes faded away. . . But never entirely.

Well, I’m sorry to say that all the talk about coffee cakes is irrelevant to what we will be eating today. I decided to start my relationship with Ovenly baking with a Honey Blondie recipe–you know, just to give us the best possible chances for success.

I am what some would call a blondie fiend. One of the first recipes I made from the Violet Bakery Cookbook was Claire Ptak’s Blondies. Mmmmmm. I love the brownie and cookie combination, and the fact that Blondies are an enabler for giant slabs of what is basically a baked cookie with a cookie dough center.

image.jpeg
Great texture and flavor.

This blondie was particularly impressive. While the bulk of the sweetness in this recipe is from brown sugar, the honey adds a noticeable flavor and greatly improves the texture. The top gets crispy and chewy, while the center stays just slightly under-baked so it’s like a two-in-one dessert.

I made a few changes to the recipe–beside halving it . . . having an abundance of sweets around will eventually make me pop the button off my jeans. Sadly, I’ve gotten over my dislike for day-old treats and will gleefully dive into leftover sweets.

This recipe is perhaps one of the fastest ever, so please don’t hesitate to have warm Blondies for dessert tonight. Or breakfast. Or second breakfast. Afternoon tea?

image.jpeg
Ready to be baked!


Ovenly’s Honey Blondies (adapted by All Ingredients Equal)

Softened unsalted butter and all-purpose flour, for preparing the baking pan
1 stick plus 2 tablespoons (5 ounces) unsalted butter

1 cup (packed) dark brown sugar
¼ cup honey
1 large egg, at room temperature (when halving, use the entire yolk and a bit of the white)
1 teaspoon salt and cinnamon, each

1 teaspoon vanilla extract (I always prefer vanilla bean paste)
1 cup plus 2 tablespoons all-purpose flour
½ cup chocolate chips (or white chocolate as I used)
⅓ cup chopped raw pecans/walnuts

Grease an 8 x 8-inch baking pan with softened butter and dust the pan with flour.
In a small saucepan over low heat, brown the butter until nutty and fragrant, but not blackened. If desired, you can skip browning the butter and just melt it in a microwave.
In a large bowl, whisk together the melted butter, sugar, honey, egg, salt, cinnamon and vanilla extract until smooth. Add the flour, chocolate chips and walnuts and mix together with a wooden spoon or a rubber spatula.
Spread the batter in the prepared baking pan. Smooth out the top and edges, and then top with the walnuts.
Bake for 25 minutes, or until the center is just set and the edges are barely golden. The blondies will be fully set when cool.
Cool completely before cutting the blondies into sixteen 2 x 2-inch squares. Or maybe just into four squares.

image.jpeg
Ready to devour.


Ovenly’s Heavenly Honey Blondies

Alice Medrich’s Winning Buckwheat Cocoa Nib Cookies

Buckwheat was always something I ate grudgingly. I could’t help but feel sanctimonious as I devoured a heavily-buttered and maple syrup-soaked stack of buckwheat pancakes. Yet I’ve developed a taste for the flavor, the subtle nuttiness and its rich, dark color.

I was attracted to this recipe because I surmised that Alice Medrich’s Nibby Buckwheat Cookies were probably like the badder (in the good sense), bolder cousin of shortbread. I like shortbread, but I must admit many plain shortbreads I’ve tasted have not been all that memorable. That definitely excludes the totally fabulous Millionaire’s Shortbread that you find all over London (Balthazar Boulangerie has a pretty amazing rendition). That’s like shortbread with a thick layer of caramel and then another of chocolate ganache. Oh yes.

image.jpeg

I haven’t (yet) tried many recipes from Alice Medrich, which is a shame and needs to be rectified post-haste. My mom always spoke of these beloved Grand Marnier truffles that my grandmother bought in the Gourmet Ghetto in Berkeley. I recently connected some dots (with the help of my careful reading of all of David Lebovitz’s blogs) and realized that my mom spoke of Alice Medrich’s chocolate truffles sold at the now-closed Cocolat.

With a bag of buckwheat flour and not much to do on an unseasonably warm February day, I discovered Heidi Swanson’s 101 Cookbooks blog and had trouble restraining myself from reading every post. Eventually, I stopped on this recipe and hurried over to the kitchen and began baking. But I will return to finish my perusal of that incredible blog.

The best aspect of these cookies is their unique flavor. I find them very satisfying after just one or two (ok, maybe three) small, thin cookies. Upon baking my favorite chocolate chip cookies, I can easily power through half a batch before feeling like I’ve gotten *close* to having my fill. These are different. Delicate and crisp, they have a very sophisticated flavor. I can see them alongside a cup of tea or as a garnish to a delicious butterscotch pot de creme (yes, that’s a pretty decadent suggestion. Just roll with it). Tonight for dessert, I served two small cookies with a little circle of Guittard chocolate and a few almonds that were the latest victims of my caramel-glazing experiments.

image
Buck(wheat)ing traditional

I made the basic cookie dough, following Medrich’s recipe exactly. However, before slicing the cookies and baking them, I took some liberties. I halved the log  and rolled one part in black sesame seeds and then I pressed one Guittard vanilla chocolate chip on top of each of the cookies prior to baking. The halva-esque flavor of the sesame seeds and the caramelized vanilla chip on top was a great addition. In the future, I would like to try using a bit of brown sugar in the dough or perhaps adding some finely chopped nuts. To completely change the flavor profile, I imagine omitting the cocoa nibs and adding in some cinnamon and pecans.

image
Just a little dessert platter is all I need.

Nibby Buckwheat Butter Cookies

Ingredients
1 1/4 cups (5.6 ounces) all-purpose flour
3/4 cup (3 ounces) buckwheat flour
1/2 pound (2 sticks) unsalted butter, softened
2/3 cup sugar
1/4 teaspoon salt
1/3 cup cacao nibs
1 1/2 teaspoons pure vanilla extract (or vanilla bean paste if you can find it)

Optional: 1/3 cup black sesame seeds and 1/4 cup Guittard vanilla chocolate chips

Directions
Whisk the all-purpose and buckwheat flours together in a medium bowl. Set aside. In a medium bowl, with the back of a large spoon or with an electric mixer, beat the butter with the sugar and salt for about 1 minute, until smooth and creamy but not fluffy. Mix in the nibs and vanilla. Add the flours and mix just until incorporated. Scrape the dough into a mass and, if necessary, knead it with your hands a few times, just until smooth.

Form the dough into a 12 by 2 inch log. Wrap and refrigerate for at least 2 hours, or, preferably overnight.

Preheat the oven to 350F degrees. Line the baking sheets with parchment paper.

Remove the plastic wrap from the cold cookie dough log and roll the dough in black sesame seeds so they stick to the dough. Use a sharp knife to cut the cold dough log into 1/4-inch-thick slices (or slightly thicker if you want to experiment with crunchy versus softer cookies. I baked half thicker and half thinner!). Place the cookies at least 1 1/2 inches apart on the baking sheets. Press in a vanilla chocolate chip if desired.

Bake until the cookies are just beginning to color at the edges, 12 to 14 minutes, rotating the baking sheets from top to bottom and front to back halfway through the baking. Cool the cookies in the pans on a rack, or slide the parchment liners carefully onto the rack to free up the pans. Let cool completely. The cookies are delicious fresh but even better the next day. They can be stored in an airtight container for at least one month.


Alice Medrich’s Winning Buckwheat Cocoa Nib Cookies

David Lebovitz and my Hunt for Bran Muffins

Bran muffins are undoubtedly one of my favorite foods. It’s partly related to the fact that when I was young, my mom made bran muffins and I alway loved stealing a bit of the raw batter and eating it. Actually, I did this on many occasions and my mom  condoned this, as we each would get out a little Pyrex dish to put some batter aside. I love the hint of baking soda mixed with buttermilk, maybe for nostalgia or maybe because it’s actually delicious . . . I’ll leave that up to you.

image
There is nothing more that I want than to wake up beside you every day 🍽

Another great thing about bran muffins is their distinctly breakfast-feel. I don’t think I’ve ever seen a bran muffin on a dessert menu, and it has at least the façade of a wholesome breakfast (and perhaps even  the ingredient list to back it up!). Some of the muffins I make could easily be served as dessert. After all, one of my favorite brunch items, French toast (Bay Area people: make a reservation at Nopa now and go get the French toast) is not uncommonly found on French dessert menus as “lost bread” or pain perdu (pro tip: La Petite Maison in London has an amazing version).

I really like the bran muffins at the Cheeseboard in Berkeley which have a great crust to them and a dense inside. For those of you in London, I very highly recommend the deliciously moist and unique bran muffins at Gail’s (especially at my favorite location on Portobello Road). Recipes for both of these to follow soon!!

The muffins I made today were actually a cross between the two I mentioned above in terms of flavor. The inside was quite moist but not to the extent of Gail’s rendition. The soaked and puréed raisins give them some moisture while the whole wheat flour and wheat bran add bulk. Interestingly, this recipe does not call for a bran cereal, but just the wheat bran flakes (I bought mine in the bulk department at Whole Foods for less than $2 a pound).

But why did I try this recipe? It’s because David Lebovitz did. One of my first “fancy” baking projects was in high school, and I wowed my class with his dulce de leche brownies (yes, yes, I know you can’t go too far wrong with those ingredients). But beyond that, I so admire David Lebovitz. The conversational tone on his blog, amazing recipes, his candor about living as an American in France, all of it. I recently heard him speak at an event in San Francisco and he was as witty and amusing as I imagined. Wait, wait, back to muffins. Well, David Lebovitz made these, and so I could be positive that this recipe from Nancy Silverton of La Brea Bakery just wouldn’t fail. I wasn’t disappointed, and nor was my boyfriend, and he has a  propensity for liking only chocolate and banana breads . . . We are working on that.

image
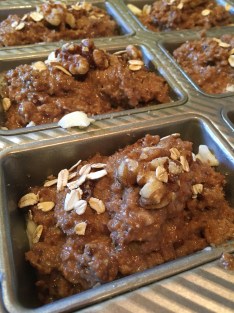
My mini-loaves after their baking session.

Note: in this recipe, as in all my baking recipes, I think it is extremely important to weigh ingredients. A cup of flour measure by me versus my neighbor will vary wildly. With weight, 120 grams is 120 grams. I think this is key with the wheat bran since it’s so light and fluffy/powdery. Despite my emphasis on weighing flours and your dry ingredients, I did just whip out a measuring cup for the oil and other liquids. For any of you Americans still doubting this idea, Europeans already use metric in baking AND Ottolenghi, Thomas Keller, Josey Baker and David Lebovitz all use this system for precision and the best results.

Bran Muffins

Heavily adapted from Nancy Silverton via David Lebovitz

Ingredients

2 cups (125g) wheat bran
1 cup, plus 1/2 cup (190g total) dark raisins (I mixed in a few dates and prunes and dried cherries instead of all raisins)
3/4 cup, plus 1/2 cup water
3/4 cup buttermilk
1 teaspoon cinnamon

1/2 cup (105g) packed light brown sugar
1/2 cup (125ml) vegetable oil
1 large egg
1 large egg white (or half an egg as that’s what I had around and the white is not beaten)
1/2 cup (65g) flour
1/4 cup (35g) whole wheat flour
1 teaspoon baking powder
1 teaspoon baking soda
1/2 teaspoon salt

To top: thick rolled oats (a tablespoon or two is good) and walnut halves (extra can be mixed into batter with the raisins if desired).

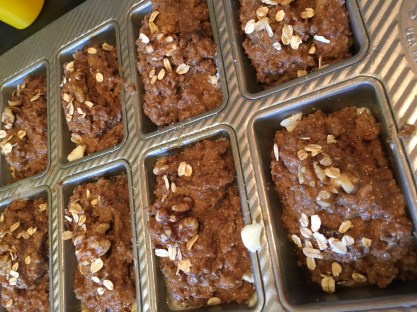
Pictured Below: the muffin batter ready to go.


1. Preheat the oven to 350F (180C). Line a 12-cup muffin tin (with 1/2-cup indentations) with paper liners or generously grease a mini-loaf pan.

2. Spread the wheat bran on a baking sheet and toast in the oven for six to eight minutes, stirring a few times so it cooks evenly. Let cool.

3. While the bran is toasting, heat 1 cup (135g) of the raisins (or dried fruits listed) with 1/2 cup (120ml) of the water. Simmer for ten minutes, or until the water is all absorbed. Puree the raisins in a food processor or blender until smooth.

4. In a large bowl, mix together the toasted bran, buttermilk, 3/4 cup water, then mix in the raisin puree, cinnamin, and brown sugar.

5. Stir in the oil, egg and egg white.

6. Mix together the flours, baking powder, baking soda, and salt, and sift directly into the wet ingredients. Stir until the ingredients are just combined, then mix in the remaining 1/2 cup (55g) raisins and walnuts, if desired.

7. Spoon the batter into the muffin tins, making sure the batter is mounded slightly in each one. Because muffin tins can vary in size, if your tins are larger, make fewer muffins. Top each with a sprinkle of oat flakes and one walnut half.

8. Bake for 25 to 30 minutes, or until the muffins feel set in the center.

image.jpeg
A swipe of butter or whipped cream cheese never hurt anyone . . .


David Lebovitz and my Hunt for Bran Muffins

Banana Bread à la Ottolenghi

I think it is almost a given that anyone that considers themself a baker, even a bit, has made banana bread (or in some cases, it should be called cake). I first made banana bread from my grandmother’s recipe in my mom’s kitchen from a tattered and oil-stained notecard when I was a very young girl. Those were the days . . . I was happily ignorant of the  thousands of calories in the one cup of vegetable oil I emptied into the mix of bananas, milk and flour.

image.jpeg
Moist, delicious and traditional.

I also will say that I think everyone believes that their mom/grandma/godfather/great-aunt-once-removed makes the best rendition of the extremely popular bread.  It is common to have superlatives thrown about casually and call a recipe “the best __x__” when it comes to baked goods, but I’m happiest surrounded by a plethora of different, delicious novel treats. I don’t need to choose a best one. I want them all.

So while you may just continue to use your own “best” recipe, I think it’s worth trying this banana bread. Then maybe someday you can pass it off as your own and then you’ll be other people’s go-to banana bread master.

This recipe is very loosely adapted from Ottolenghi’s Grilled Banana Bread with Tahini in Plenty More. My version is neither grilled, or sesam-ized in any way. But it’s a nice classic, comforting bread great for tea, breakfast or a midnight snack.  For those of you that can be intimidated by Ottolenghi’s notoriously-long ingredient lists, I assure you this recipe is mercifully simple.

I made a tasty crumble topping for the banana loaves and thought it was a worthwhile improvement. The small loaf pans made the nicest banana bread that was still moist but had a good crust and a “healthy” amount of topping. The bread in muffin form was noticeably less good.

image
The muffins were still good but less decadent and delicious than the bread.

Ingredients

180 gms pecans (or walnuts, as I used)
3 large ripe bananas, peeled and mashed (300 gms)
275 gms  light brown sugar (I use C&H dark brown sugar for more flavor and because even the dark brown is rather light)
3 eggs, lightly beaten
140 ml full-fat milk
70 ml sunflower oil
275 gms plain flour
1 teaspoon bicarbonate of soda
1½ teaspoons baking powder
Salt (a large pinch)

Topping

Mix together 50 grams of plain flour, a handful of walnuts, a handful of oats, 50 grams brown sugar and 50 grams of butter, with a dash (or more) of cinnamon. Combine until a sandy texture.

Preheat the oven to 170°C/340°F and grease a mini loaf pans generously with butter and oil.

Place the pecans/walnut on a baking tray and roast for 10 minutes before roughly chopping them and set aside.

Place the bananas, sugar and eggs in the large bowl of an electric mixer and beat until combined. With the machine running on a slow speed, add ½ tesapoon of salt, the milk and then the oil. Sift together the flour, bicarbonate of soda and baking powder and, with machine still running, add this to the mix. Continue to mix on medium speed for about 5 minutes, until thoroughly combined. Stir in the pecans/walnuts and then pour the mixture into the loaf tins. Top the mini loaves with a good portion of the crumble on each.

Place in the oven and bake until a skewer or knife inserted in the center comes out clean, about 20-35 minutes depending on the size of your loaf pans. Let sit for 10 minutes before removing the cake from the tin and setting aside on a wire rack until completely cool. You can now wrap the bread in foil and keep for up to 5 days, or freeze for a few weeks.

image
The topping is especially good when this is served as a breakfast cake, as it’s similar to a granola.

While totally biased as a self-proclaimed Ottolenghi fanatic, it only makes sense that even Ottolenghi’s banana bread transcends the typical loaf (sorry Mom and Gran . . . ).


Banana Bread à la Ottolenghi

Full Disclosure: What I Won’t Make

The title of this post in some ways belies the name of the blog, All Ingredient Equal. I like the general philosophy of cooking with as much variety and as (w)holistically as possible, but I think I should also be upfront now and just get on with it and say a few things I just won’t eat:

  1. Almond Extract: I love raw almonds, roasted almonds, frangipane, almond creams, almond butter, and so on. But anything with that  marzipan or almond extract flavor doesn’t appeal. Like at all. If you don’t know the smell I’m referring to, just take a whiff of any almond extract.
  2. Scallops: I consider not liking scallops a gift in some ways since they are incredibly expensive. I like nearly all other seafood, but something about scallops doesn’t entice me.
  3. Anise: While I still enjoy tarragon (which has a somewhat similar flavor profile) and limited amounts of fennel, anise is one of my least favorite spices and is too much like licorice for me.
  4. Beer: This is more about drinking, but I will drink (one sip) of beer if I have to. Or just to try. But I haven’t yet met a beer that I would enjoy 8 or 12 or 16 ounces of, so I’ll save the Guinness for my cakes and stews, thank you very much. I’ll do cider though. Especially the lovely and very sweet Swedish cider you find in London, Rekorderlig. 
  5. Biscotti: This is not a strict rule (the Big Dipper Biscotti made by Phoenix Pastificio is complex and chewy and totally delicious). Yet I’m not one of those dry-cookie people. Chips Ahoy only became good when they launched Chewy Chips Ahoy. I love cookie dough and soft cookies but dry cookies are blasphemous (I’ll excuse a few like shortbread).
  6. Candied Fruit Peel: I’m very conservative in my use of lemon and orange zest, but I can’t get into any sort of candied fruit peel. The texture is a bit strange for me, and the flavor rather bitter. That orange marmalade won’t be in my house (never, EVER) You also won’t see me go near recipes that have orange and chocolate mixed . . . except for maybe a Grand Marnier truffle.
  7. Mint and Chocolate Combination of Anything: For me, this is like trying to swallow a chocolate truffle while brushing your teeth. I’m sorry world, but mint chocolate ice cream is not on the horizon here.
  8. Grapefruit: I think a lot of people are on board with this one. It’s like a pink orange, so it should be even sweeter, but instead has this sad bitterness.
  9. Marshmallows: Yes, once in a great while (every 5 years or so when I somehow find myself camping), I will have one s’more that is so packed with chocolate that you’ll be hard-pressed to find the marshmallow as it is likely to be totally enrobed in thick layers of melted (likely sub-par) chocolate. But I don’t want to find any marshmallows following me back from the forest and sneaking into my ice cream, hot chocolate or sundae-topping box (yes, there’s a box).
  10. Baked ham: A perfectly cooked pork chop is totally decadent, but the rubbery, giant slab of sandwich-style ham seems as if it’s a completely different beast. I don’t like the total uniformity of how it is cooked and the generally overly-sweet sauce that is so liberally splashed all over it.

So this is where I am coming from. Perhaps over time my explorations will lead me to encounter a recipe that will forever change my dislike for marzipan/scallops/beer/mintchocolate/grapefruit/marshmallows/bakedham/fruitpeel/anise/biscotti.

Here’s to hoping.

Full Disclosure: What I Won’t Make

Josey Baker Breads

I’m very sorry to say that it is only recently that I have completely fallen for the Mill in San Francisco. OK, OK, let’s just get it out of the way now:

Will you actually pay $4 for a piece of toast? Yes. But it’s more like a slab if that helps. I’ll even splurge and pay extra for that decadent almond butter.

Are you a hipster? Not really, but I will surrender to the fact that I do have some questionable tendencies in terms of my food tastes.

image
That cinnamon sugar bread! Not pictured: almond butter, the second toast my boyfriend couldn’t resist later ordering.

This whole love affair with the bread was first sparked when I dined at the fabulous neighborhood restaurant Frances near the Castro. The meal began with a warm slice of Josey Baker’s Seed Feast. Since then, the bread was always on my radar, but rarely would I make the trek over to this part of the city for a loaf.

image
Seed feast at Frances.

In early January, my brother and I went to the Mill for the first time and it is now always a weekly breakfast for me. After my first visit I went online and was thrilled to see that the Mill offered bread baking classes. Can you get better than learning from the best?

image
Josey demonstrating bread techniques.

Just yesterday I had my two hour session, and was lucky enough to have the treat of Josey Baker himself teach the class. It was a great, informal and information session which gave me some important guidance in knowing how the bread should feel at each stage and the proper kneading, mixing, flouring and baking technique. I bought the Josey Baker Bread Book beforehand to read up a bit and get oriented.


To be frank, until very recently, I had no interest in bread making. Or more like anything-involving-yeast-making. I worried that I would kill it by too hot or cold water, or that it simply wouldn’t behave. Yet my fears are now (mostly) assuaged as I now have a lovely bit of Josey’s own sourdough starter now happily living in its spacious container on top of my fridge. I fed it this morning and think we’ve gotten off to a pretty good start(er).

Perhaps the most exciting aspect of the class (besides learning from Josey) was bringing home a loaf that we had shaped. We didn’t have time to make the entire loaf start to finish as that is such a long process. But this was equally exciting and I can tell you that the bread I baked off at home was absolutely delicious.

image
The beauty post-baking.

I will continue my bread baking adventures frequently with my boosted confidence after the class (and that nice bit of starter I now have!). Here’s to the starchier years ahead.


Josey Baker Breads

Shrove Tuesday Pancakes

Shrove Tuesday was pretty foreign to me before I went to London (read: I had no idea what it was). It was an extremely welcome surprise that in London it was not only totally acceptable–but encouraged–to dive into a pile of pancakes on this otherwise average and unremarkable February day.

This year, since the temperature in Berkeley rose to over 70 degrees, it only seemed proper to lighten my pancakes a bit. By this, I mean I omitted my usual chocolate chips from this batch of hotcakes.

I adapted this buttermilk pancakes recipe from Berkeley’s own Bette’s Oceanview Diner, which has a cult following and attracts hoards of people to its 4th Street cafe. I don’t wait for hotcakes, but when I do, it’s at Granger & Co. on Westbourne Grove in London.

image.jpeg
Granger ricotta hotcakes, looking as angelic as ever.

The recipe is fairly simple, but it has a few extra steps which I assure you are very well worth the effort. I whipped the egg white separately from the yolk and folded in the stiff egg white at the end to make lighter, fluffier pancakes. It totally changes the consistency in the best possible way. I now do this with all my pancake and waffle recipes as it prevents dry, dense,  flat disappointing discs of dough. Remember, breakfast is the most important meal of the day. Breaking a 12 hour fast clearly calls for (daily) celebration.

In a weak attempt to make these a bit more nutritious, I substituted a quarter of the all-purpose flour for red whole wheat (any whole wheat would suffice). I like the slightly hearty flavor and think it’s a great combination with the blueberries, raspberries and walnuts I added in.

As always, I serve my pancakes with (a plentiful amount of) salted butter, pure maple syrup and jam on the side.

Happy munching and brunching.


image
Practically a plate of superfoods.


Shrove Tuesday Pancakes